As easy as it has gotten to set up a social media ads campaign, it has turned up the heat of the competitive market even more.Using ads manager is not a hard nut to crack. Every other business is using it these days and you don’t necessarily need to hire a person with the expertise to do it.In today’s blog let’s teach you how to set up a social media ads campaign, one step at a time.We are assuming that you have a Facebook page.
Ads Manager
Ads Manager is the place from where you can access all your ads record with their detailed data. It gives you detailed insights about how your ads performed. You can also view how much budget have you spent during a particular time span.
Also Read: Social Media Ads Campaign; why should it be a priority
Another perk of using the Ads Manager is that it lets you schedule ads for the future as well. While you can boost a post without having to go to the ads manager, it is always advisable to go for an Ad campaign rather than doing the former. `
Setting up the Campaign
Now that you are in the Ads Manager, go to your account. You don’t have to set up the account yourself as there is one by default for everyone.You will be taken to yours when you click on your name under the ‘Account’ column.Now you will see the following columns:
- Account overview
- Campaigns
- Ad sets
- Ads
Hit the ‘Campaign’ button.Now tap on the ‘Create’ icon.A screen like this will appear.

This is Ads Manager that lets you set up Ads campaigns.[/caption]The first thing you need to do is to set the objective of the campaign. Having a clear objective in mind is important as it defines what you want to achieve out of the ad campaign. You can only choose one. Once chosen, the manager would know what tactics to use.Now scroll down to name your campaign.

You can also change the name of your campaign.[/caption]Name it appropriately for future reference. Tap on the ‘Continue’ icon to proceed.It will take you here:
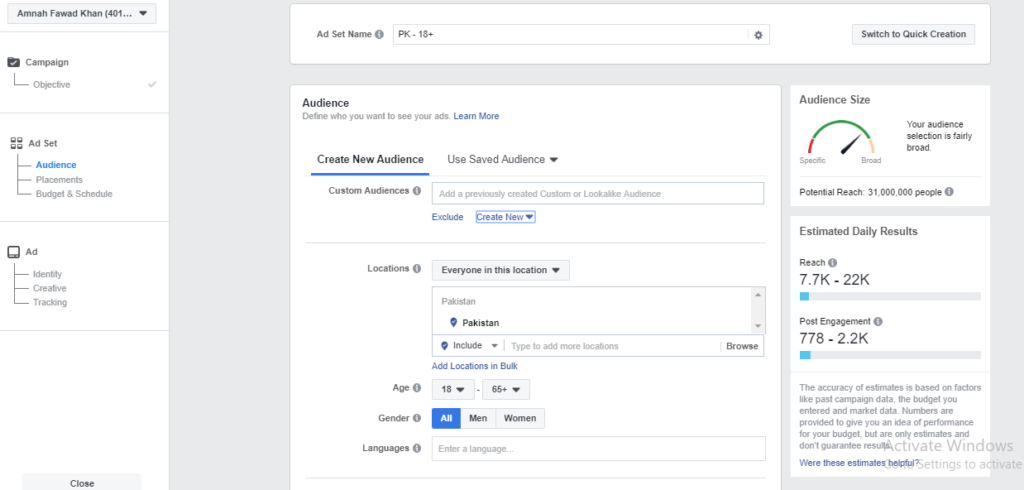
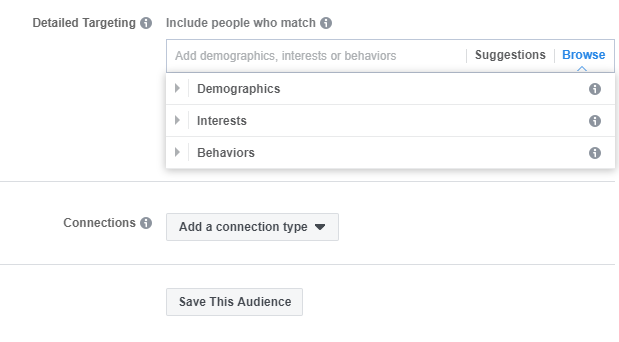
You can create a new audience or use an older one.[/caption]Now comes the most crucial part; creating your audience. The ad manager gives you the liberty to choose who gets to see your ad.On a very basic level, you can select the gender, age group, and the location of the audience.The location filter gives you the option to (a) select the region and (b) who in that location. You can either choose to target everyone in the selected location or the ones who recently visited it or the residents of that location.If you want to delve in further, you can also filter the audience according to their interests, behaviors, and demographics.
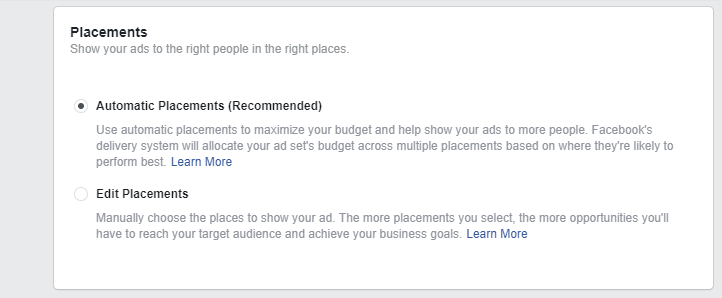
Now choose where would you like to place your ads. This is where your ad will appear to the viewers. Although you can choose that yourself, Facebook recommends you use the automatic placements and so will I am speaking from experience.
Budget & Schedule
Budget and scheduling is a very crucial part. You can set a minimum budget of $1 per day. Once you have set the amount, decide for how many days do you want to run the ad campaign. While boosting a post directly does not give you the opportunity to schedule the ad for later, setting up the ad does.
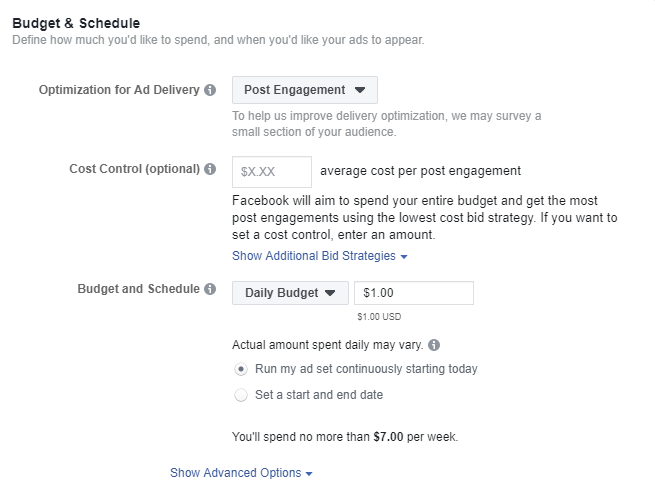
You can schedule the starting and the ending time and date for the ad campaign.
Identity
Then, you will be asked to choose the page through which you want to run your ad.

Creative
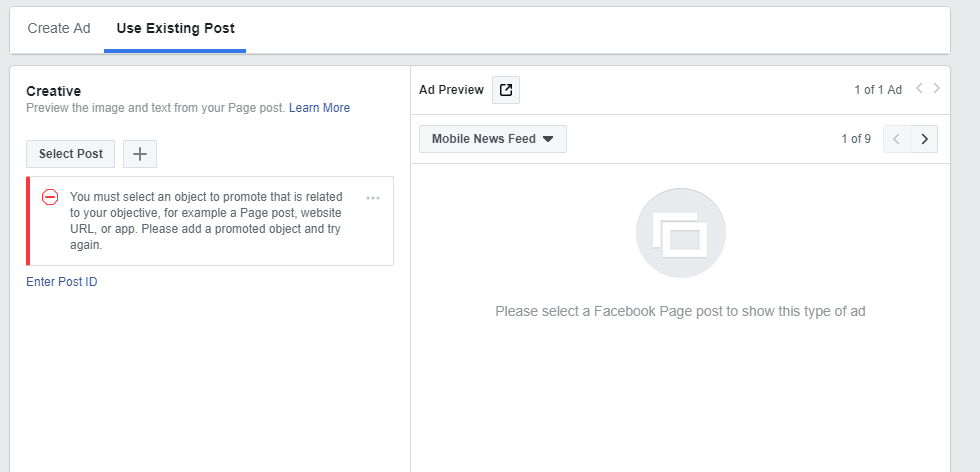
Now comes the main part of setting up social media ads campaign; choosing the creative for the ad.You can add the visual as well as the caption to go with it. You can create a slideshow of up to ten pictures for a single post.
Tracking
If you have connected your website with Facebook Pixel than you can easily monitor the conversion rate for your products. You can even target your website visitors with your Facebook ads using Facebook Pixel.You can also skip this step if you don't have Facebook Pixel.

Summing Up
Once you are done with the last step, your social media ads campaign is good to go.Setting up a campaign is not as hard as it seems and if you follow the aforementioned steps properly, you will do just fine.Do let us know what you think in the comments section below!


